
Welcome back to Data transformation the series
Part two weeks I was taking about the basic concept and reshape data in Power Query.
This week we will drive through the advance feature in Power Query which is “M language”.
However, I will not deep drive into the hardly coding. It’s essential concept that the novice liked us need to know for preparing and analyzing the data effectively.

Let’s top up how to data manipulation skills together !
Before going to M code stuffs, there is important step that enhance transforming data for insightful analysis which is “Combine Data”.
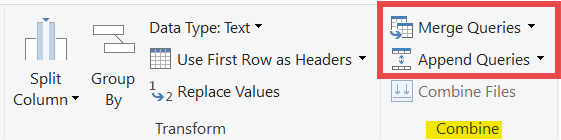
There are two features which is Append and Merge queries.
🧩 Combine data
To combine the spread across several different sources to connect it together, that will help to analyze the data properly.
Where to find Append and Merge queries go to home > combine session
**Note appending data “Column name” need to be exactly the same**
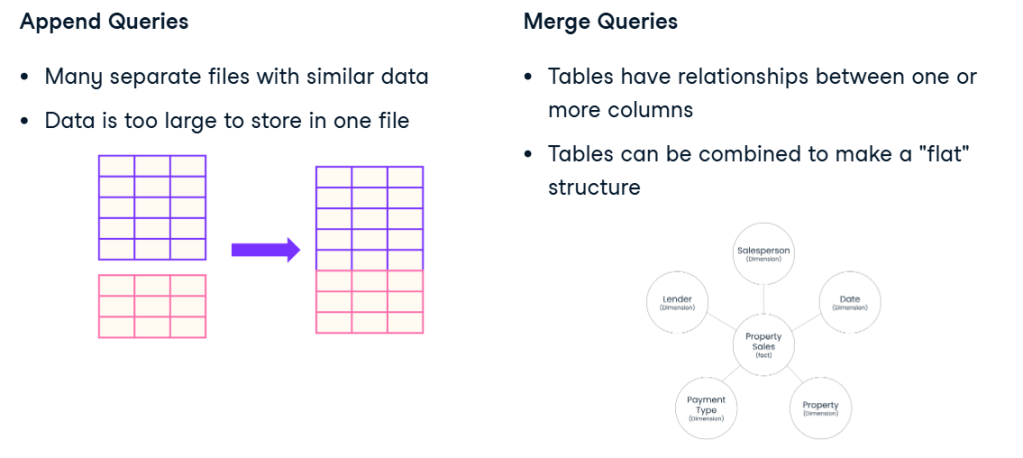
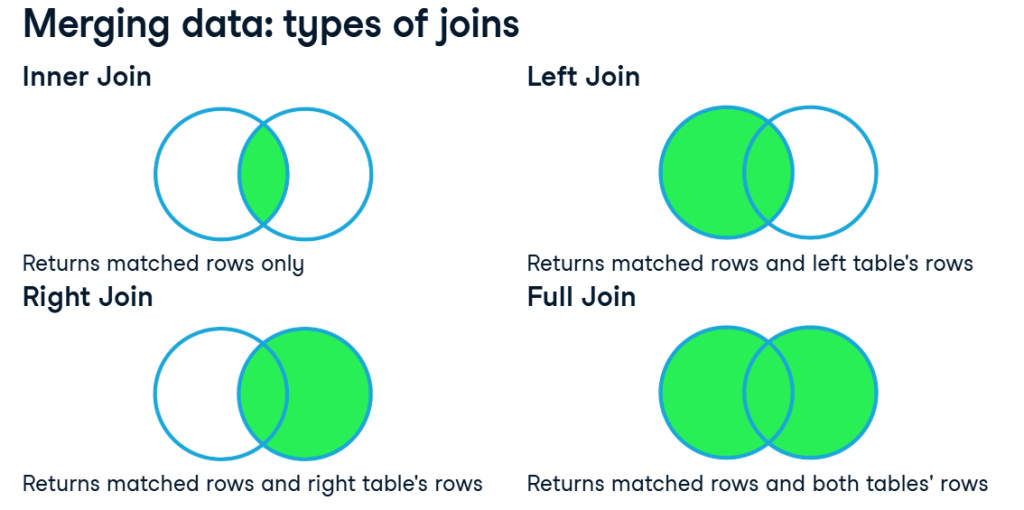
There are the several type of joining tables.
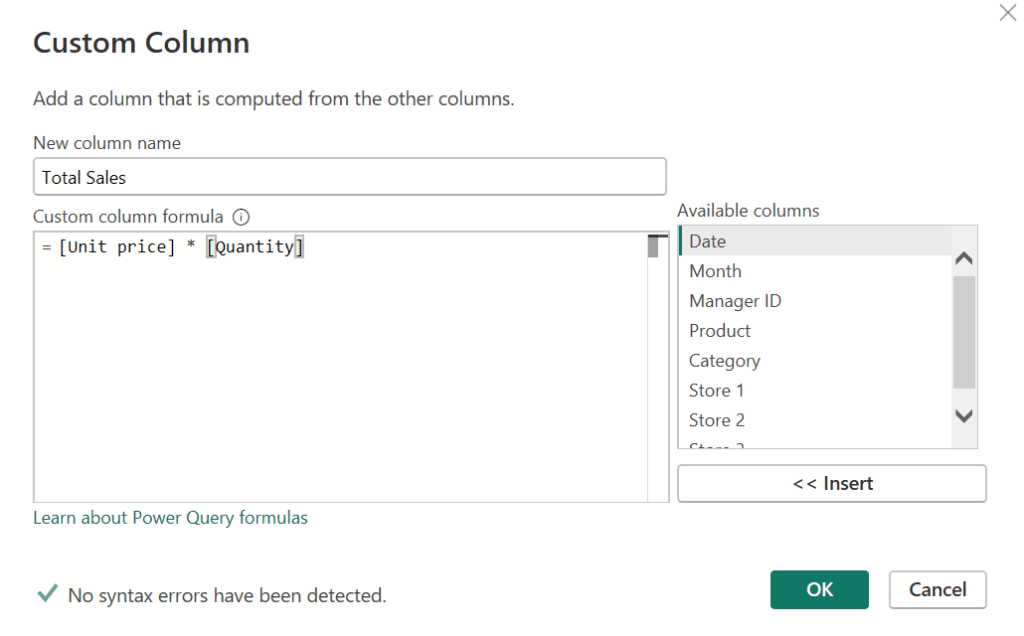
Additionally, there is another flexible tool that will help you modify the table which is “Custom Columns”
🧩 Custom columns
To create new data fields using the Power Query M formula language or by providing examples. This feature allows for operations like calculations, text concatenation, and conditional logic.
Where to find the tool go to add column > General session

Operation for custom column
Number :
- Adding (+)
- Subtracting (-)
- Multiplying (*)
- Diving (/)
- Exponentiating (^)
Text concatenation :
- Ampersand (&)
Comparison operation :
- Less than (<) , Greater than (>)
- Not equal (<>)
- Less than or equal to (<=) , Greater than or equal to ( =>)
- Equal (=)
Conditional logic :
- If, then, else
- AND, OR, NOT
For example; Creating new
Total sales column = Unit price column * Quantity column
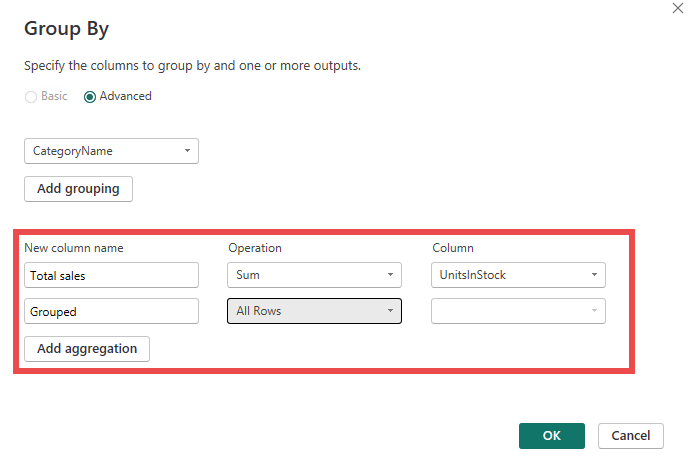
To be more advance we can combine custom column with the group by feature by using “All row operation” so, the result of table will contains two columns, one with the categories, and another that condenses all the columns in our previous dataset.
Here is the result.
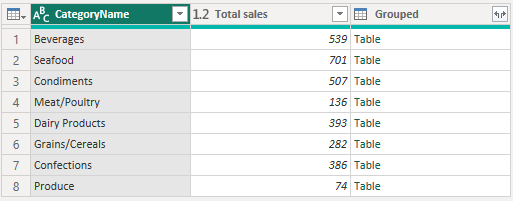
We can see a preview of this data by clicking on any of the cells as well.
“It’s time for M Language”
🧩 Introduction to “Advanced editor”
Go to view > Advance session

Advanced editor where you can see the source code of your query.
The advance tool is kind of translation of applied step that you see on the right hand site which you working in Power query.
The language that it’s translated called “M Code”
The M languages is not just translate from applied step to M code. It can be vice vasa.
To write M language is similar to other programing languages that allow you to store variables, implement custom function and Make advance transformation.
Data type in M language is Number , Text, Logical “true , False” , Date and also including List and Table
Example
- List = {2026, “M language” , true}
- Table = #Table({”Index”,”Value” }, {{”a”,”123”}})
Let’s starting with New blank query.
Here is the advanced editor in first step look liked.
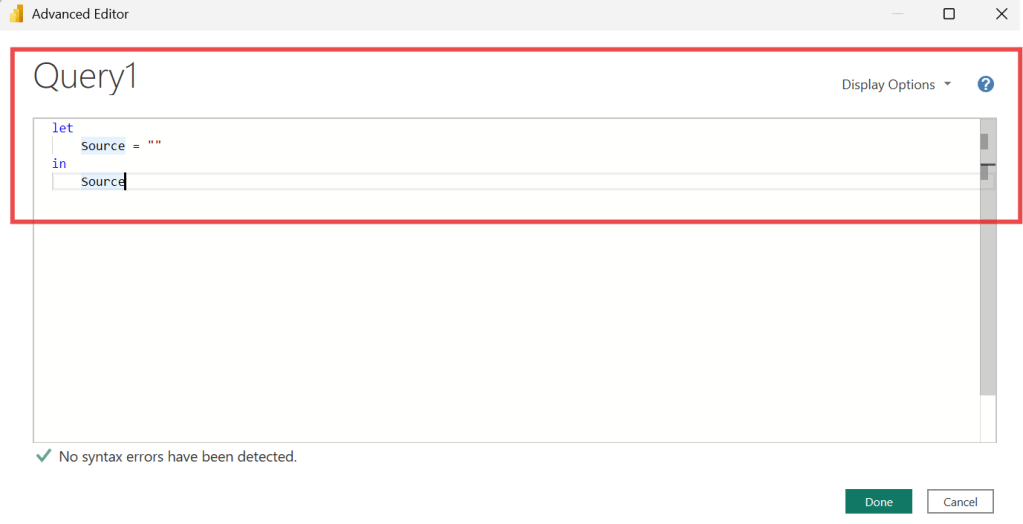
It begin with “Let” and “In” statements which are how the query expressed begins and ends.
let...in Expression :
letintroduces a block where variables (steps) are defined.inspecifies which variable or value from theletblock should be output as the final result.
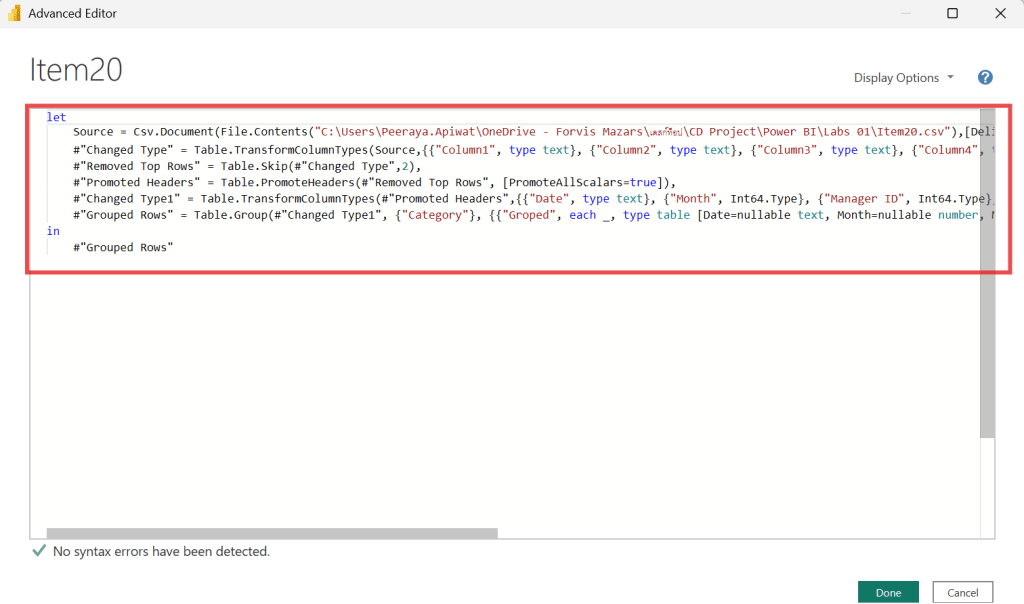
Let’s translating the M code together
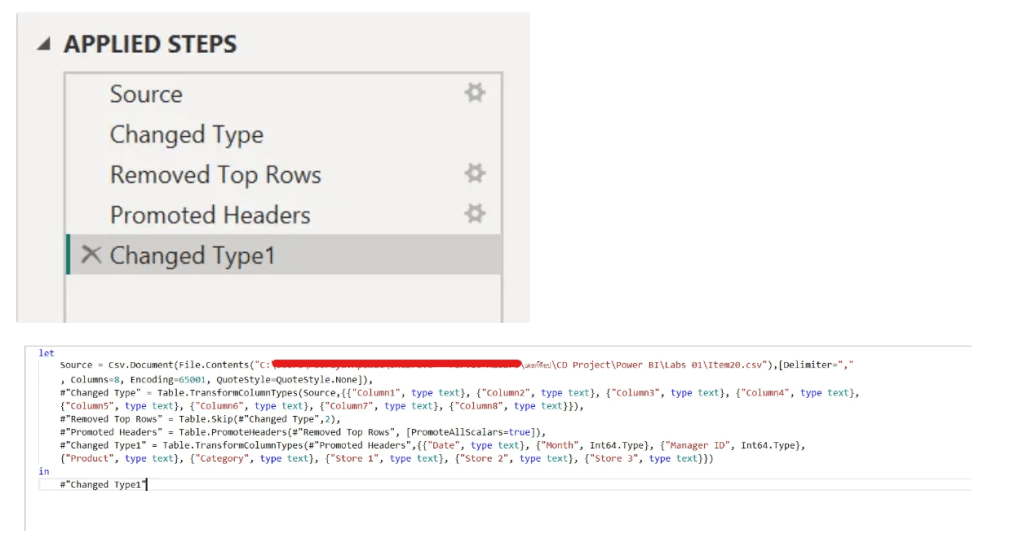
The first line, Source is your first load data that you load into power query and how did you connect the located data source in Double quote (””) and red color. (If you want to change the data source , you can replace the path of new data source here,)
Example for connected function :
- Csv.Document(File.Contents(“Located file.csv), Delimiter=”,” ……)
- SharePoint.Tables(“Located SharedPoint table”, [Implementation=”2.0″, ViewMode=”Default”])
After connecting data it will be transformation steps, whether it be #changed type following by which column that you want to change data type then new data type , #removed row or #promoted header.
It’s important note that each step of the query it’s always mention to the name of previous step in the code. (Except first query no need to reference to source)
To ensure that the steps are executed in correct order.

**Noted :Int64.Type is the data type for a 64-bit signed integer
(whole number). **
As you see after “in” statement it will be shown the lasted step of transformation.

💡 To learn more about M language💡
https://learn.microsoft.com/en-us/powerquery-m/power-query-m-language-specification

Leave a comment